 Well howdy! Hope you had a fantastic weekend and President’s Day! Did you get any purging done? Organizing? Getting rid of STUFF?? :)
If not, hopefully you’ll be inspired to do just that after this shindig!
One of my favorite little tricks of late is a bit of a decluttering/organizing combo. I’ve discovered a new love when it comes to organizing, and it’s not rocket science.
It’s the good old Ziploc bag:

This certainly isn’t anything new – I’ve seen folks all over blogland use them often. But it was just recently that it clicked how AWESOME they are for the kid stuff.
I have a love/hate relationship with the boxes that the Bub’s toys and puzzles come in. I love that they are so easily stacked and put away, but hate that they fall apart so easily and take up SO MUCH space:

Especially those memory games – the actual pieces take up so little space in that big box.
So, I started using bags instead, and I LOVE IT:

It’s such a simple thing! They’ve made a difference though. It must be something about seeing the pieces, or just the ease of getting to them -- but the Bub seems to want to play with his games even more now, and is so helpful when it comes to putting everything away.
Now, we just toss the baggies in big bin, which helps the clean up too:

I now have 14 different games in that one bin – there’s no way 14 boxes would have fit.
This makes Momma HAPPY. And you know when Momma’s happy, everyone’s happy. :) Ha!
But really…it’s the truth. For reals. YouknowwhatI’msayin’.
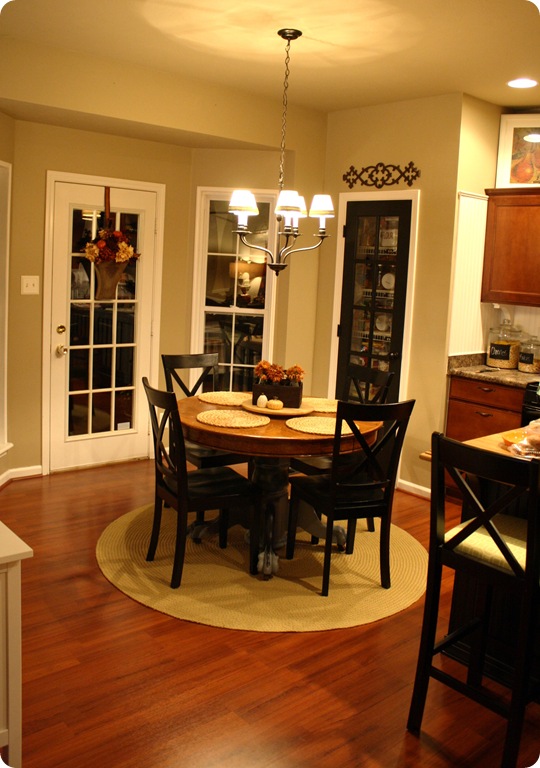
I also used the baggies to organize the little addition I showed you in our living room:

I pulled the former changing table/former office storage dresser into the room last week and LOVE it.
Like I mentioned, even though this is our “formal” living room, we use the space pretty much every day. I thought the dresser would be a great spot for all of our puzzles.
Oh, the puzzles. And…puzzles. Big ones, little ones, so many puzzles:

:)
But you can see that I could barely fit four large boxes in one drawer, and that wasn’t going to work at all.
Baggies to the rescue again:

Four boxes took up almost the whole drawer, and now six big puzzles take up just over half of the space:

Do you hear the singing? I. love. it. It’s just such a satisfying mix of decluttering and organizing – getting rid of the bulky, torn up boxes, but still having everything separated and easy to get to.
I’ve got the little puzzle pieces in bins, but am planning on putting them each in their own bags as well:

For the floor puzzles, I cut out a picture off the box so we have something to refer to when putting it together. :)
Someday when we’re done with these, I’ll just donate them in the bag – I doubt the box will matter that much to the next family. It’s working out GREAT for us!
So…let’s see what you’ve got! Link up any organization ideas, decluttering tips, even cleaning suggestions. Anything that will help us get our lives under control is perfect for this party!
Make sure to link up to your post – not your blog. The party will be open through next Monday evening.
Have fun and enjoy! (I accidentally made the boxes a little small, sorry about that! Tried fixing it but can’t for some reason.)
Do you love Pottery Barn and Ballard Designs?
You’ll LOVE Knock Off Decor!


Hello all! I’m back this month with a very simple but beautiful (I think so anyway) before and after project!
It started with a recent trip to Goodwill – I don’t go as often as I used to (see my STUFF post), so I haven’t found nearly as much good stuff as I used to. (You have to go fairly often to get the good pickins.)
But that day, the heavens shined down on this beauty on the top shelf:

Ummm…OK, well the shape was beautiful. I guess the flowers weren’t that bad, they just weren’t what I was going for. :)
But the size, the lovely lines, the beautiful spout – they had me at Hello.
I knew I could spruce her up with a few coats of spray paint. And a “few” coats turned into about eleventy billion. Or so. Maybe about seven. Whatever.
It took five coats of spray primer to get those purdy flowers covered up. I did an additional two coats of a glossy white on top.
After trip to Trader Joe’s for some (fairly) cheap tulips, I was able to bring my vision for this cutie to life:

Oh SWOON. Just…swoon. I am so ready for tulips people. I actually don’t mind the snow that much – but we’ve been hammered with it and ice over the past couple of months (way more than usual) and I’m really starting to miss green grass.
Will I ever see it again?
I don’t care what Punxsutawney Phil says, I think it’s gonna be awhile. :)
Even with the meeeellion coats of spray paint, this is one of my easiest and favorite spray paint transformations yet:

I wish I could have gotten some shots in the daylight, but we got home from dinner too late. I’m ready for more photo taking hours in the day too, while we’re talking about spring. :)
I absolutely love the pretty shape – looks like it came out of a Pottery Barn catalog doesn’t it?


Only their version -- $39. Mine? A whole five buckaroos. :)
WHOO HOO!
Now, I won’t be pouring any lemonade with mine – it’s just for holding beautiful flowers. And I’m totally OK with that.

I just LOVE IT.
Soooo…my before and after for the month – a Goodwill find transformed with my beloved. My BFF. Spray paint:


Now it’s time to see what you’ve been up to!
Be sure to link up to your post, not your blog. And I’d love it if you’d include this pretty little button and a link back to this post:
 I’m trying a new linky this time, so I hope this works! :)
Have fun – I’ll leave this open for a week, so link. it. up!

It’s here! The final party in our Holiday Home series is finally upon us. :)

I hope you’ve enjoyed the parties as much as we have!
Year after year, my hubby and I waffle back and forth on whether or not we should get a fake tree. EVERY. year. The conversation usually starts about January 2nd, when we’re hauling a massive, shedding tree out the front door, and trying to get it back on the car to take it to the recycling. With a needle trail following us the whole way…
It basically comes up when we are over. it. :)
This year, we decided to finally take the plunge and go faux – and we headed to Lowe’s to get the BIG honkin’ tree we had been eyeing for weeks. It was gone, so we called two other locations -- gone. Called one more, and they had the display available -- “Come and get it!” Lowe’s guy said.
We drove ten minutes to the store and walked in to see someone else wheeling it out. GAH. It was nuts! Did I mention it was still November?
Sooo…we decided to go for a real tree again, and hubby insisted we go BIG. (So THERE!) ;)
And big we did. She’s tall and fat and chunky, just how we like ‘em. Twelve feet tall to be exact. It’s go big or go home around here!
The theme of our main tree is always traditional, always gold and red, and always has lots of sparkle!
I used the ornaments we’ve had for years:


Those cheap glitter ball ornaments are so great – they look fantastic and the price can’t be beat!
Because we usually purchase a nine to ten foot tree, we didn’t have quite enough ornaments to fill it. Well, we did…but I like lots and LOTS of ornaments in there. :)
I got a few more at Big Lots for a STEAL:


I love sparkle!!
I picked up a new one from the Rockettes show over Thanksgiving:

I like to get one new ornament a year to signify something special, and this one is perfect. :)
I stick all kinds of stuff in the tree every year, like the twirly sticks and some gauzy stuff from Hob Lob that positively GLOWS:

I love my poinsettias placed here and there:

All that filler stuff is great for hiding empty spots, cords, whatever.
The Bub helped me this year and the bottom of the tree is dripping with ornaments:

I let him put them wherever he wanted, and I didn’t move one afterwards. :)
Every few minutes, an ornament he had just put on the tree would plop on the floor, and I’d hear a little voice yell, “It’s otay Mama!!”
I heard that many, many times that day. ;) Ugh, I could squish him!!
The other night, I walked into the living room and found hubs sitting in there, staring at the tree. We LOVE it. And we do love our real trees – maybe next time we’ll plan ahead and go faux. But for now, that smell is pretty amazing.
And of course, it’s best with the lights low:

I can’t wait to see your beautiful trees!
You are welcome to use this cutie little button in your post to link back:

Have fun – I’ll leave the linky open for a week for those of you who need a bit more time. :)
P.S. I have to send a hollaaa out to Wendy G. and Alexis C. – thanks for the love on Facebook!! ;)
Thank you to my sponsor!:


Hey all! Whew, we have Internet back! I actually started a different post last night for today’s Before and After Party, but when I drove up to our house this morning after running errands, I changed my mind.
I love love LOVE the front of our house at Christmas. I was so taken with it, especially with all the pretty snow, I wanted to share this instead today.
I usually have the same recipe to our outdoor decor every year, but I changed it up just a bit this year (that would be easier). :)
I started with a couple $3 big honkin’ sparkly bows from Big Lots on our spray painted coach lights:

They’re a little droopy, but I LOVE the pop of red!
Our porch hasn’t changed much:

I showed you how I hang the greenery every year here. Last year I added the red ribbon and ornaments and I love that festive touch!
The wreath is a basic (fake) evergreen with the beautiful amaryllis wreath from Target wired on top:

I drooled over that red wreath for weeks and got it on clearance a couple seasons ago. I love how layering them combines the green and red, makes it super full and gives some padow!! to the front porch. ;)
For years, I’ve hung lighted wreaths over our windows, but this year I was inspired by a picture in a magazine and wanted to try something new. I ADORE our shutters, so I wanted to play them up.
I took some simple small wreaths and just looped some basic red ribbon through to hang them from the top and bottom:

I just used one tack at the bottom and top to hold them on and they’ve held up great. (This spring I need to replace some of the wood on the shutters and repaint them – they’re starting to look a little worn!)
I usually put some greenery in the window boxes, but goodNESS it got cold fast. I’m just going to deal with the frozen kale. ;)
And that’s it! We feel all smooshy and googly when we drive up this time of year, especially with the lights on at night. :)
The snow totally completes the look, don’t you think?:

:)
So here’s my before and after for the month of December – our windows in the past (which I do love!)

And the slightly simpler version this year:

And our porch before, as it looked till two weeks ago:

And now:

Funny how the temp has dropped about 50 degrees in two weeks! I could barely stand to be outside long enough to take these pictures. YIKES. It sure does feel and look like Christmas around here! ;)
So what have you been up to? I can’t wait to see your Before and Afters! And don’t forget to link up to Kate’s crafty party tonight! I need to get busy!

Remember to link up to your post, not your general blog address!
Thank you to my sponsor!:
Hello there! Welcome to the Before and After Party for November! (Can you even believe it’s November?) I can’t wait to see what you’ve been up to! But first, I wanted to show you the pain-in-the-booty project that I am SO GLAD is done.
Remember the pantry door transformation I showed you?:

I was lucky enough to get this beauty for FREE with some help from an Amex Points promotion. But, like always, I saved some cash by installing it myself (with Dad’s help!).
It wasn’t the easiest project ever. Actually, it was really quite annoying. And the part I finished up this weekend didn’t help it’s cause. Sheesh!
I mentioned I wanted to cover the windows on the door with something – I originally bought window film -- but it wasn’t the texture I was looking for. (I ended up using it for the ghost in our foyer!)
So when I posted this project, a few of you mentioned you had used plain old contact paper to get the look I was going for. Bahhhrilliant!
I admit I was a little teeny tiny bit doubtful – I picked up some clear contact paper at Target, and when I got home I tore it open, I was expecting it to be perfectly clear.
Well…you Squeezies were right (I know, I should just believe) – it was exactly what I wanted! A very soft, hazy look – just enough to let light in, but block the view to the canned goods. :)
What you lovelies didn’t tell me was it was a TOTAL AND COMPLETE pain in the booty to install. Gah. OK, maybe you did. I may have blocked it out.
I started with my supplies – not much needed:

I tried a few things, and the pan scraper worked best for this project by far! I cut out a piece of contact paper, slightly larger than the window pane. When I installed it, I used a razor to trim the contact paper so it would fit perfectly in the pane.
The problem was…1.) the contact paper is supersonic and I tried four razors and not one would cut it easily 2.) when I would push hard to get through the “paper,” the knife would grab at the painted trim around the panel and little itty bitty flecks of black paint were coming off and getting stuck under the plastic:

It was a lot of trial and error. Lots of cutting, holding it up, cutting, holding it up, cutting, realizing I had cut it too small, starting over. :)
When I would finally get the right size, I’d make sure it was perfect one more time:

Then I soaked the window with window cleaner:

You can try to do this without soaking the window but you will realize quickly it’s next to impossible. :)
When it’s wet, you can move it around and make it fit just so:

Then use your scraper (or any flat surface) to push out the bubbles:

You’ll want a paper towel handy to soak up the cleaner as you go. Lots of pushing, wiping, pushing, wiping.
It took FOREVA. Mostly because I would cut it the wrong size, or scratch it when peeling it off the backing. I lost my mind a little more with each window pane. :) I think it took four days of me tackling it whenever I had a few minutes to tackle it. FUN stuff.
Did I mention I couldn’t use the same size cut out of the contact paper for every window pane? You’d think they were all the same size, but amazingly – NO. Most were just a tad different. How is that possible? Because it’s a Sarah project, that’s why. :)
BUT. Dare I say it…SO worth it!!


And I LOVE it.
But I wasn’t done yet. :) Remember how I wanted to light up the inside of the pantry? Dad and I talked and figured out how we’re going to do it – but for now, I rigged it up with an extension cord just to see how it would look:

SWOOOOON. Exactly how I pictured it in my head all those years ago when this project first popped in my head. ;)
I used rope lights around the door frame to get the “glow” look. And now I can see to find my sour cream and onion chips at night:

Awwwww yeah. All is right in my world. :)
**The instructions on the rope lights say to not put them in an area with no ventilation, as they get just slightly warm. I called the hotline on the package to confirm a pantry is OK, and the man on the phone had no record of the product number – the product they make – so he was zero help. But I have talked to two people experienced in wiring/lighting, and they said it’s absolutely fine. When the manual says the lights get slightly warm, they mean slightly warm. :)
The contact paper idea would be perfect for any smallish window where you want privacy but don’t want to block the light – for cheap! The roll was $5 and even with all of my mess ups, I barely used half of it. This would be a great solution for windows above tubs, sidelights by a front door – whatever!
So there’s my before and after for this month…I don’t have a before, before picture handy of the white door we had up initially, but here’s the new door unpainted:

Here it is painted:
And here it is all soft and purdy and lit up:

And here’s all of our food for the world to see before, and the softly lit after:
It makes even wire shelves look pretty. :) This wasn’t an easy project…but totally worth it. And only five bucks for the privacy! (Which, by the way, is WAY cheaper than the window stuff you can buy.)
I am one happy chick!! :)
It’s time to see your before and afters! Remember to only link to the specific post – not your blog. I’ll leave this open so you can link up till next week!
Link it up yo!