
Materials: STOLMEN, MUDDUS table
Description: This is not a real hack, just a new use to an IKEA item, but since I have not seen STOLMEN used in the kitchen, I thought I'd show it to you.
When a whole cupboard full of plates fell from the wall, we knew we had to find another kind of shelf, that is not fixed to the wall. Also we were looking for a small breakfast table for the kitchen.
So we went to IKEA and found STOLMEN. The poles are fixed to the ceiling and the whole structure is really solid. I had always wanted a cookbook stand, and the STOLMEN shoe rack is just perfect. The clothes rail makes a good pole for kitchen rolls, I just fixed it with two of the many allen keys you get from IKEA.
In the future I plan to buy 2 STOLMEN hooks and 2 small metal boards, screw everything together and lay the clothes pole into the hooks (too short now.)
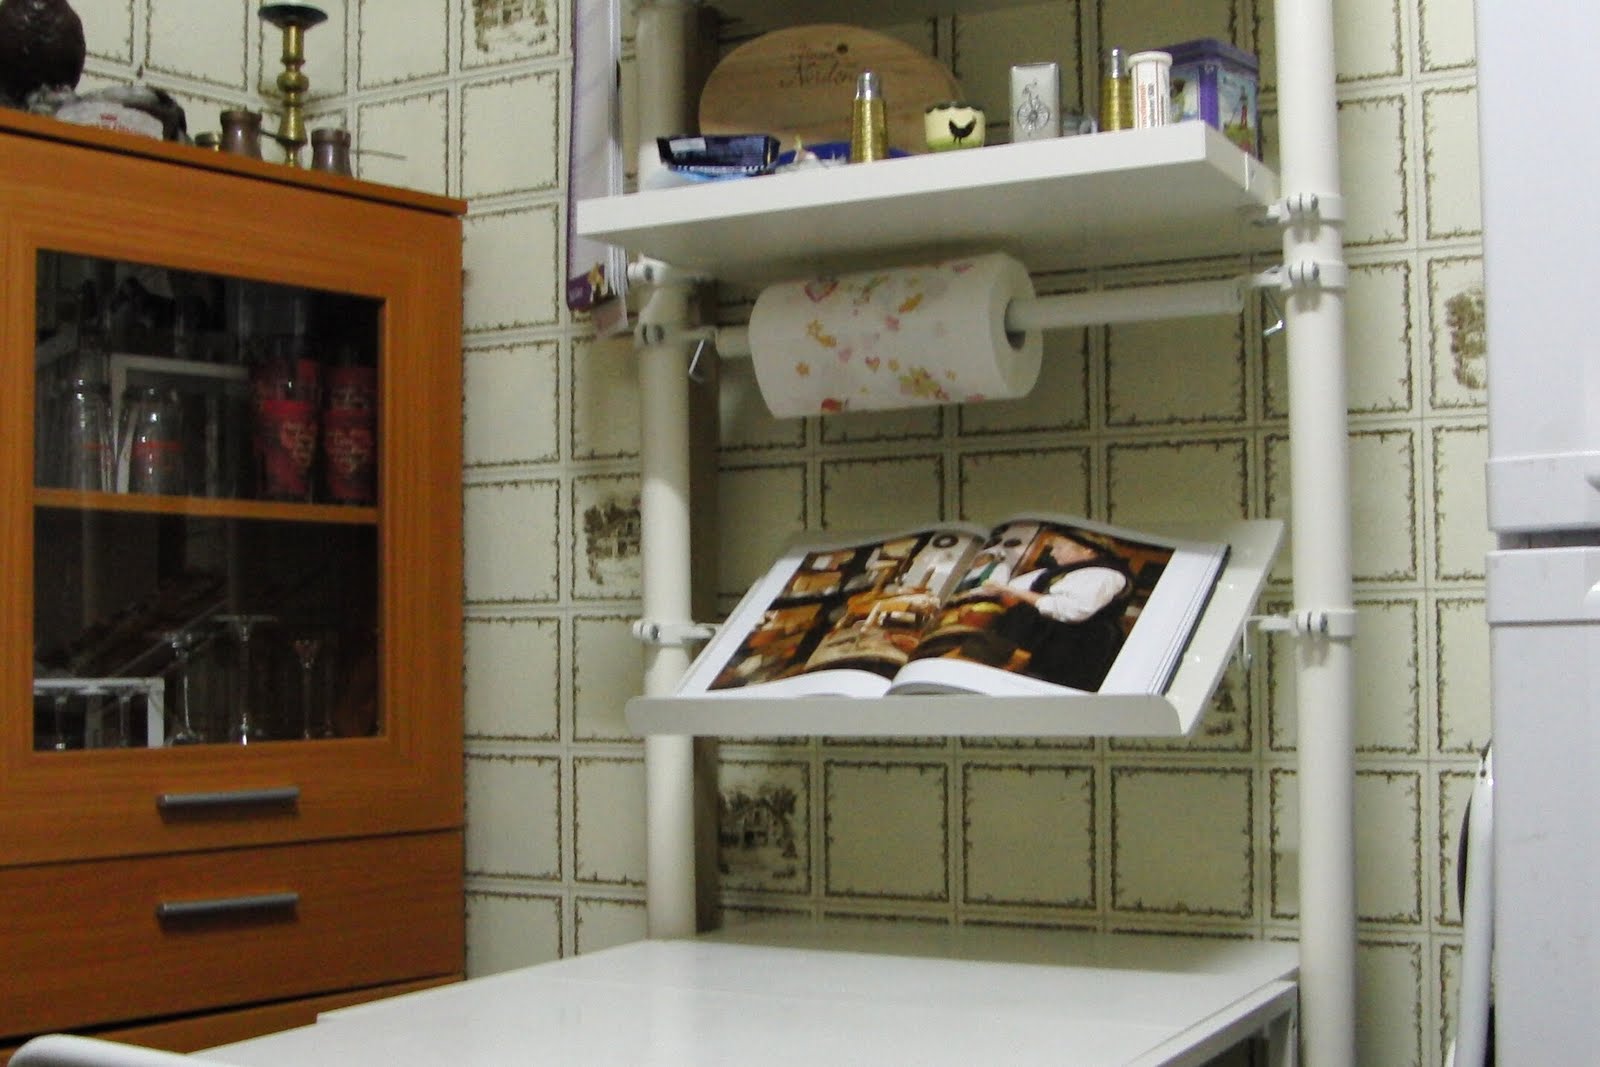
That the MUDDUS table fits perfectly between the two poles is an added bonus that we didn't plan. (Those things never work, when you plan them).
See more of the Stolmen kitchen.
~ Susanne, Antequera, Spain

Materials: Stolmen post and hooks
Description: Scratch post from stolmen post, small trees, carpet, a large plastic barrel and some other scraps. (Also featuring kitchen worktop, shelf brackets, copper water pipe and some old textile and a huge amount of sisal rope and glue.)
See more the Stolmen Scratch post. (Google translation here)
~ Selma, Norway

Materials: x2 Ikea Stolmen Posts, x2 Ikea Clothes Rail 43 1/4", x4 Ikea End Fixtures, x1 generic universal 32- 60" LCD TV flush wall mount, x4 rope binding hooks, x6 1/4"x1" hexagon bolts with nuts, x6 flat washers, x6 locking washers, Screwdriver, Wrench, Pliers, Ruler, Level
Description: I started this project because I wanted to have a cool way to mount my newly purchased 55" LCD television. The problem was that I live in a small apartment and I needed to save as much space as I could without putting more holes in my wall. Seeing as how Ikea no longer sells their Stolmen TV mount, I went onto the internet for ideas, including this site, and I found pictures of other people's project but they either had vague descriptions or required an excessive amount of work or materials (like a drill). So that's how I came up with this idea where I would use a hooking system that required only basic materials from Ikea, any hardware store, and a basic tool kit (which was also purchased at Ikea- i.e. no drilling needed!)
I started by setting up the poles equidistant from the wall and using a level to make sure they stood up straight.

I then loosely attached the 2 clothes rails using the end fixtures (loosely so that I can adjust them a little later)


Using the two mounting brackets from my universal tv wall mount, I attached two of the hooks to the bracket- one at the top and one around the middle of the bracket. I attached the hooks to the bracket using a combination of the bolt, washer, locking washer, and nut (two for the top hook and one for the bottom hook)

The bracket-hook combination was then attached to my television using the screws included with the wall mount. Measuring the distance from the top hook to the bottom hook, I was now able to make final adjustments to the clothes rail to match the same distance so that each rail would carry the same weight of the TV. Once finally adjusted, the rails were screwed tight in place.
Once the rails, the poles, and brackets were all tightened into place, the TV was then carefully lifted and gently placed into position so that the top 2 hooks were latched onto the top rail and the bottom 2 hooks were latched onto the bottom rail. The TV was centered by simply sliding it either left or right on the rails.
~ Victor Pham, Chicago

Materials: Stolmen system modified with tv mounting bracket, bolts, screws.
Description: I modified a Stolmen system to accommodate a flat panel TV wall mounting system, one that would normally be used to mount a flat panel TV to a wall, using one of the larger (46") shelves as a panel on which to mount the TV. My goal was to create a stabile support for a flat panel TV while preserving the aesthetics of the Ikea Stolmen system. My theory of Ikea hacking is that the final product should not look overly "hacked" to the casual observer.
Click to read more>>

Materials: Besta, Varna, Stolmen components

This piece is based on the 1953 Power Plant (pix, right).
First, I assembled the base using three Besta cabinet bases. Since they have paper cores, I inserted strips of pine inside the two plys of laminate to fasten them together.
Sides and doors are made of recut Varna doors. Original hinges are used, but new pocket holes needed to be made with a Forstner drill bit.
The top is made of two Varna doors. It is fastened to the cabinet using IKEA cam lock hardware, which again, needed to be redrilled with a 15mm Forstner bit.

A router and circle jig was used to cut smooth holes for the Stolmen poles to go through. The entire cabinet is supported by Stolmen brackets on the underside.
~ Jeff Carter, Chicago


Materials: Stolmen. and pax doors
Description: I saved over $300 and got more space for storage.
~ Mark, San Francisco

Materials: 1 Stolmen post, 2 Stolmen end fittings, assorted bangles, split rings (keyrings), eyelet screws, curtain hooks, screws
Description: Despite scouring the shops and internet, I couldn't find a curtain pole to fit snugly into the niche of our large window without needing cumbersome and ugly central fittings. The extendable Stolmen post offered the perfect solution.
As the Stolmen post has a diameter larger than most curtain rings, my husband came up with the idea of using bangles instead. We made these into curtain rings with an assortment of eyelet screws (for the larger ones) and split rings (for the smaller ones).


We used Stolmen end fittings on one end to stop the bangles sliding past the change in diameter where the Stolmen post extends (in case they get stuck):

Although this stops the curtain being pulled all the way back, we lose only a small amount of light due to the size of the windows.
We extended the Stolmen post into the window frame and screwed it in place for extra stability.
The result, a neat and colourful alternative to the usual suspects!

~ Shel, London

Materials: To hang 2 bikes: for the 'stand': 1 Stolmen post, 2 Stolmen end fittings, 4 Stolmen hooks, square metal tubing, bike inner tube, nuts and bolts, screws. for the 'stabiliser': 2 Dignitet curtain wire packs (i.e. 4 end fixings), Stolmen bracket, steel with a 90° twist, nuts and bolts, saw
Description: This is an adaptation of a hack posted in 2008, which my husband found whilst searching for a sleek storage solution for our 2 mountain bikes. We liked the idea of using the Stolmen post to make use of our incredibly high ceilings and an awkward shaped niche in our office (that wouldn't fit a standard wall mounted bike stand). We also hacked the Stolmen post to hang our bedroom curtains and wanted to see how many uses we could put it to in our home!! However, as we have a suspended ceiling, we couldn't fully utilise the expanding feature of the post to secure the stand in place, so we had to hack another Ikea product to create a stabiliser.
We followed Michael's hack from 2008 for the main bike stand, except that we used inner tube to cover the hooks for a more durable finish: [picture bike hanger]. We also screwed the post into the floor for extra stability.

To make the stabiliser, we (i say 'we'; i mainly just watched and documented progress with my camera!!) cut the twisted steel to size and then clamped it to the Stolmen post with a standard issue Stolmen bracket and a bolt. After some battling with the wall studs, we placed Dignitet end fixings on the walls behind and in front of the post to prevent the post being pulled forward by the weight of the bikes and also to provide some support in case of inadvertent clumsiness on my part.

We then connected the curtain wires over the steel and clamped them in place with another piece of the cut steel and more bolts, like so:


It took longer than Michael's half an hour, but we think the result is pretty funky.
~ Shel, London

Materials: STOLMEN, LACK, EXPEDIT , SIGNUM, KOMPLEMENT (Shoe Rack)
Description: It took me 2 weeks to design this Stolmen DJ Studio. I have downloaded the tool from IKEA site and used it to design and visualize what I've wanted.
1. I installed 4 STOLMEN Post without drilling.
2. I place the EXPEDIT Shelving unit with all my Vinyl Records.
3. I installed the STOLMEN Shelves 1 on top of the EXPEDIT shelving unit then the others.
4. I installed the STOLMEN Shoe Rack to use for MacBook Pro.
5. I installed all 4 LACK Shelves and screwed the sides of the LACK Shelves on the STOLMEN mounting fixture to give more stable support.
6. I installed 2 metal plates on the wall and hooked the KOMPLEMENT shoe rack (Slanted) on top of Rack shelf (For Mic Mixer and Trigger Finger).
7. I installed the STOLMEN hook to hang Headphones.
8. Finally, I installed all DJ gears , PC and accessories, I used SIGNUM cable organizer and Velcro to organize power supply and cables.
~ Mitch aka DJ MX3, Dubai, UAE

Materials: STOLMEN
Description: A continuation of my old STOLMEN project.
STOLMEN end fixtures now support wood board with 15kg LCD panel + router, cable modem media player, and external hard disk + all power and network cables cables hidden between the shelf and wall.


~ Pavel, Israel

Materials: Stolmen, Expedit
Description: Poles and brackets are Stolmen, Storage unit is Expedit. Desktops and Shelves are from my workshop. Very adaptable and solid.
~ Charlie Priced